Written by: Jack
Planetary System: Sol
World: Earth
Date: 18.01.2026
And now the follow up! Here's the casting stage of my drop pod project. This was my very first time casting anything, and perhaps I was a bit too ambitious with this one. It is a very big model! If you arrived here from somewhere else and haven't yet seen the making of stage, check out the previous blogpost.
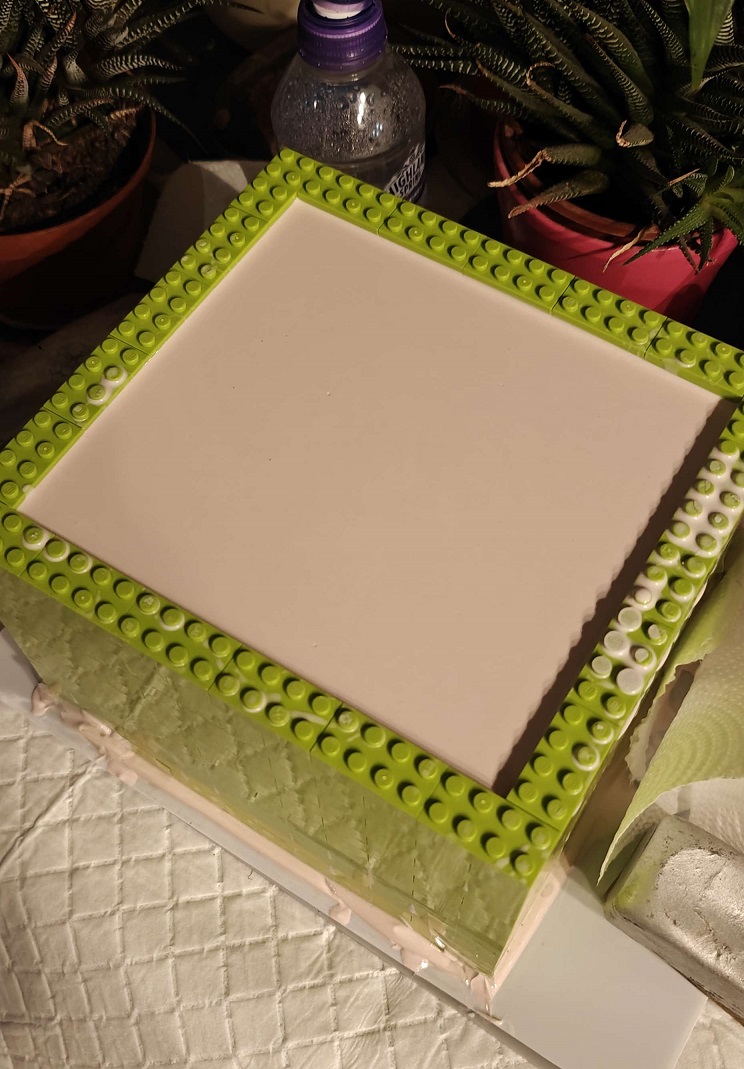
The first thing I did was construct a box out of lego bricks which will act as the frame for the mould. I saw a tip online somewhere where someone (I forget, this was a year ago now!) said that lego bricks were a great material as you can construct them to size and they are easily deconstructed afterwards. They are also completely reusuable! Sounds perfect.
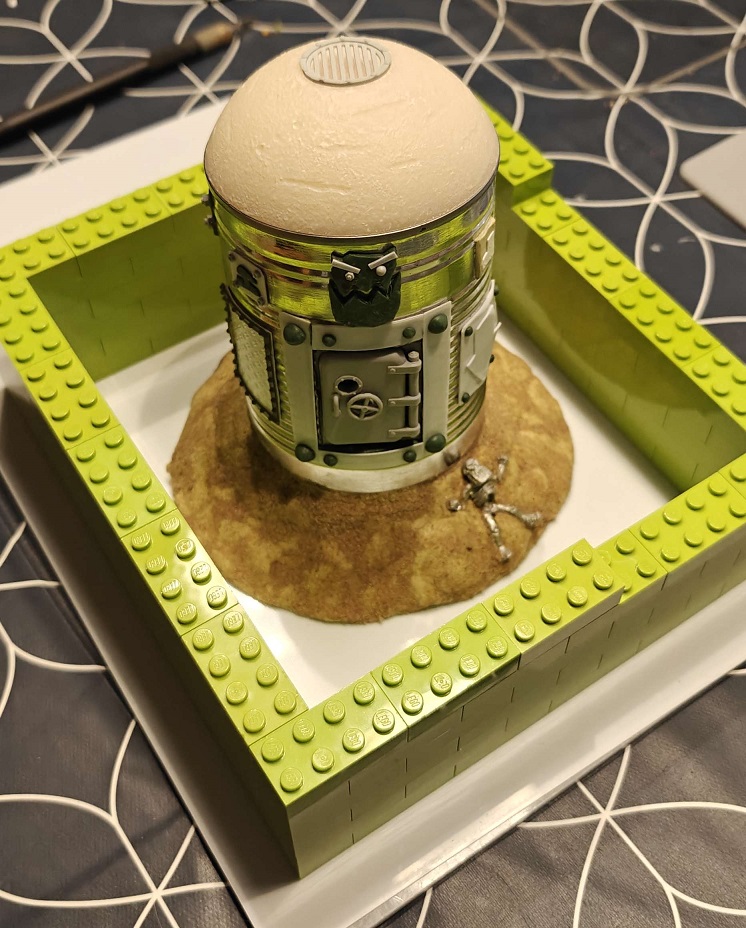
To prep the drop pod, I gave it a spray with MACWAX release agent. I'm not sure how much this would help but I figured that I'd need every little bit of help I could get for when it came to removing the master model from the mould. The silicone I bought is Polycraft GP-3481-F RTV Silicone. With some help from my brother so I could hold the camera, the silicone was mixed thoroughly and poured from a tall height into the box. I was told that pouring from far above would help the silicone flow into all the right places properly and reduce bubbles.
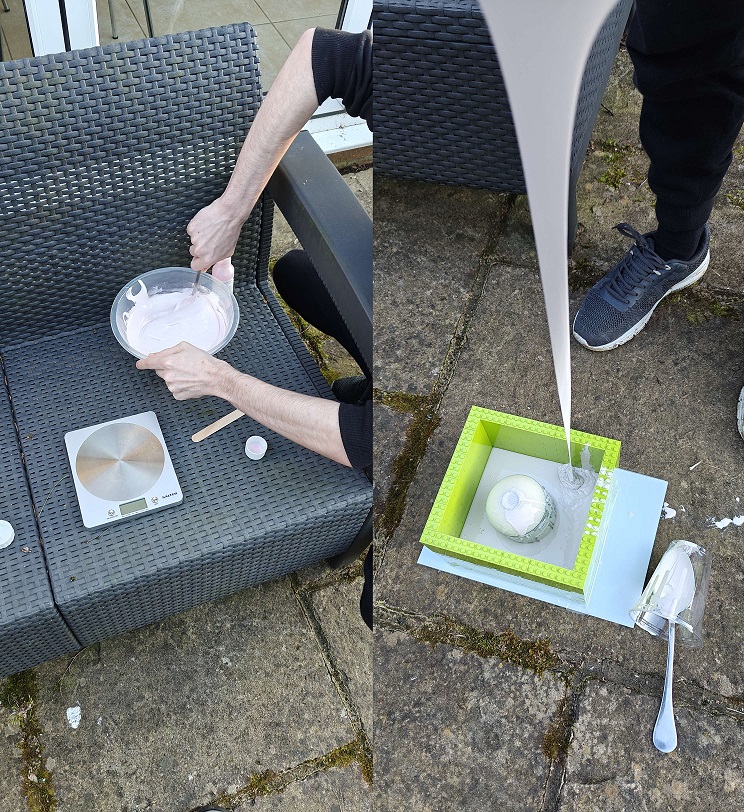
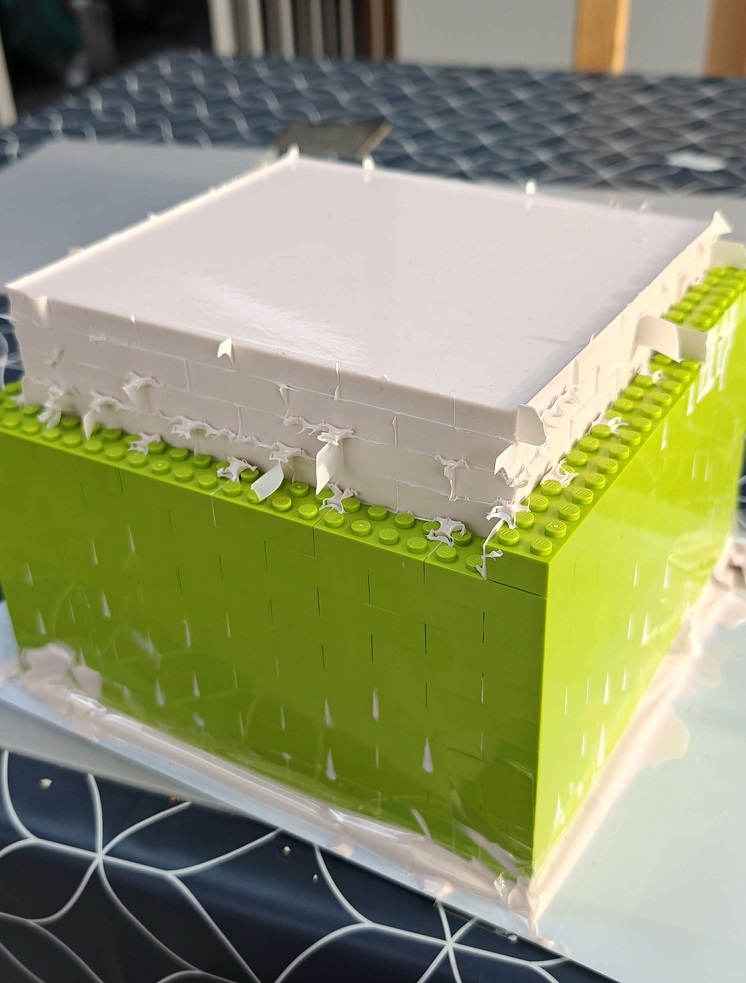
Now all I had to do was wait 24 hours. The technical sheet states that the curing time is 6-8 hours, but not to demould it until 12-24 hours had passed. Not quite sure what the difference is but I waited the full 24 just to be safe. As a precaution to anyone else doing this, if you're making a huge mould like mine, make sure your box is *really* sealed at the bottom. At first it filled up fine but the sheer weight of all the silicone started to push some out the bottom under the bricks. My cellotape barrier held but only just.
Now the fun part, freeing everything. The bricks came apart easily but the can itself was definitely not easy to remove. In fact, it took a lot of time, force and patience. I'm really glad I used release agent as the silicone did not want to give it up. Thankfully it finally popped free and I was left with a really nice looking mould!
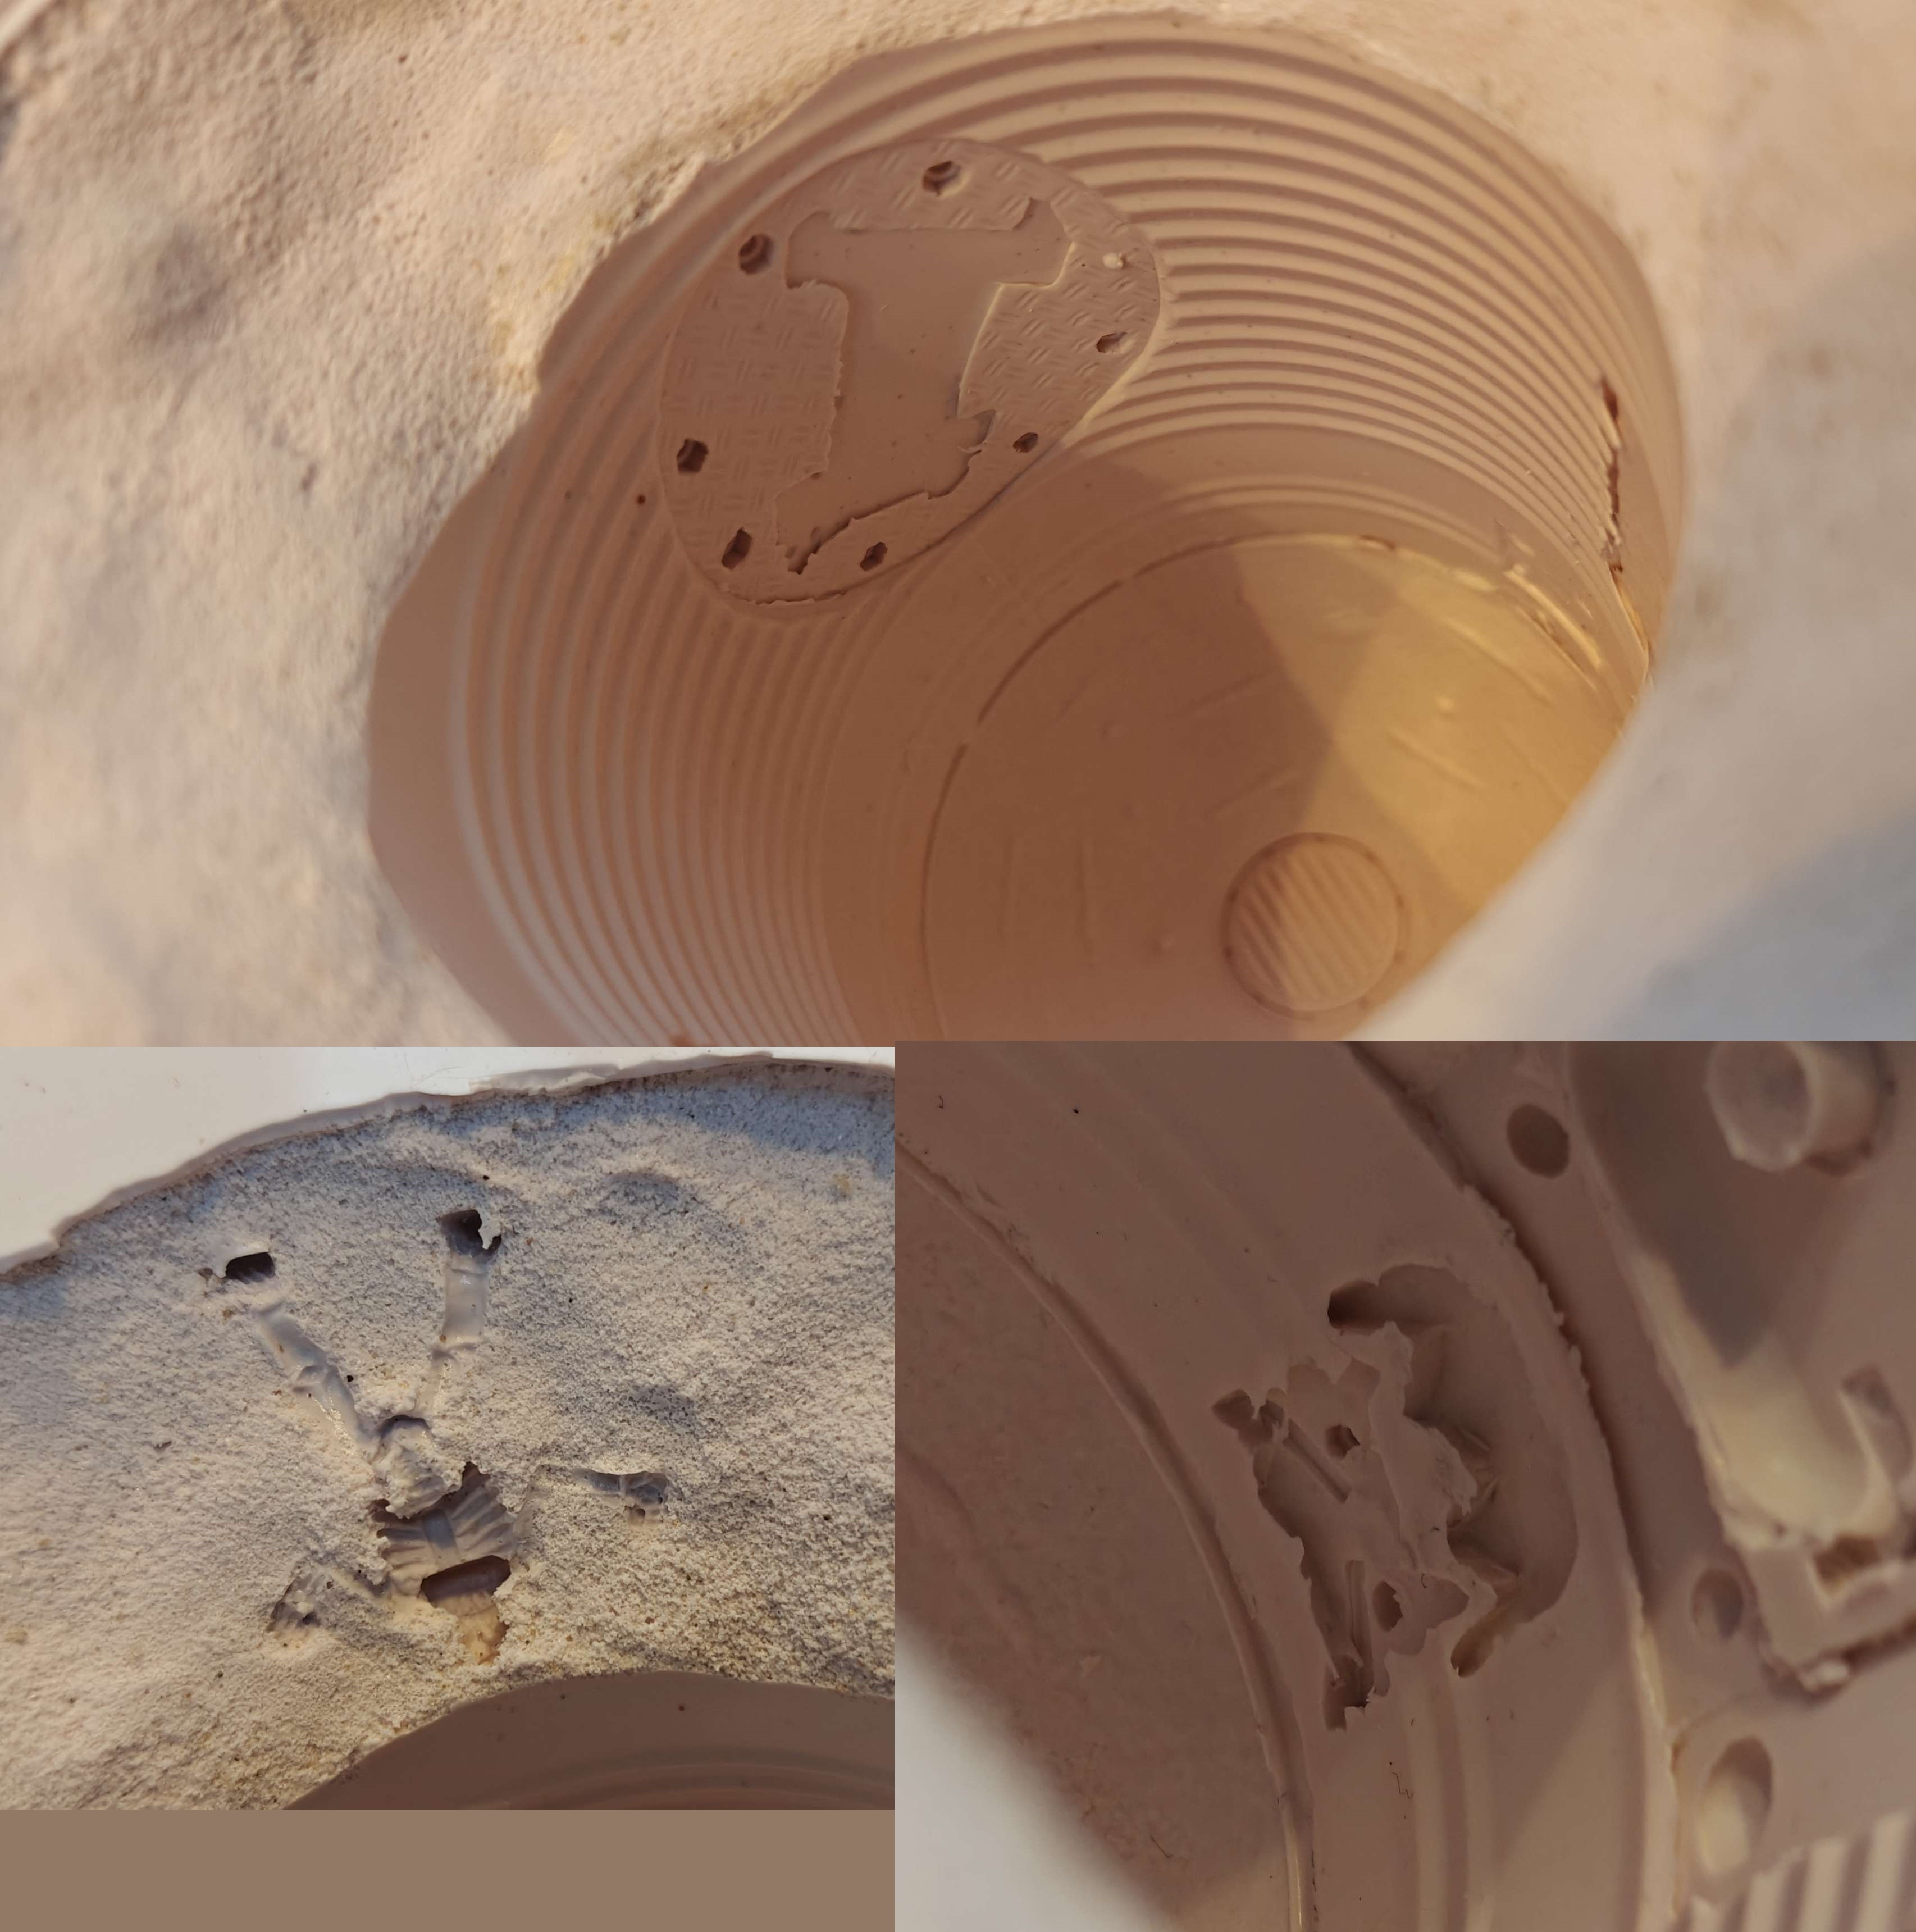
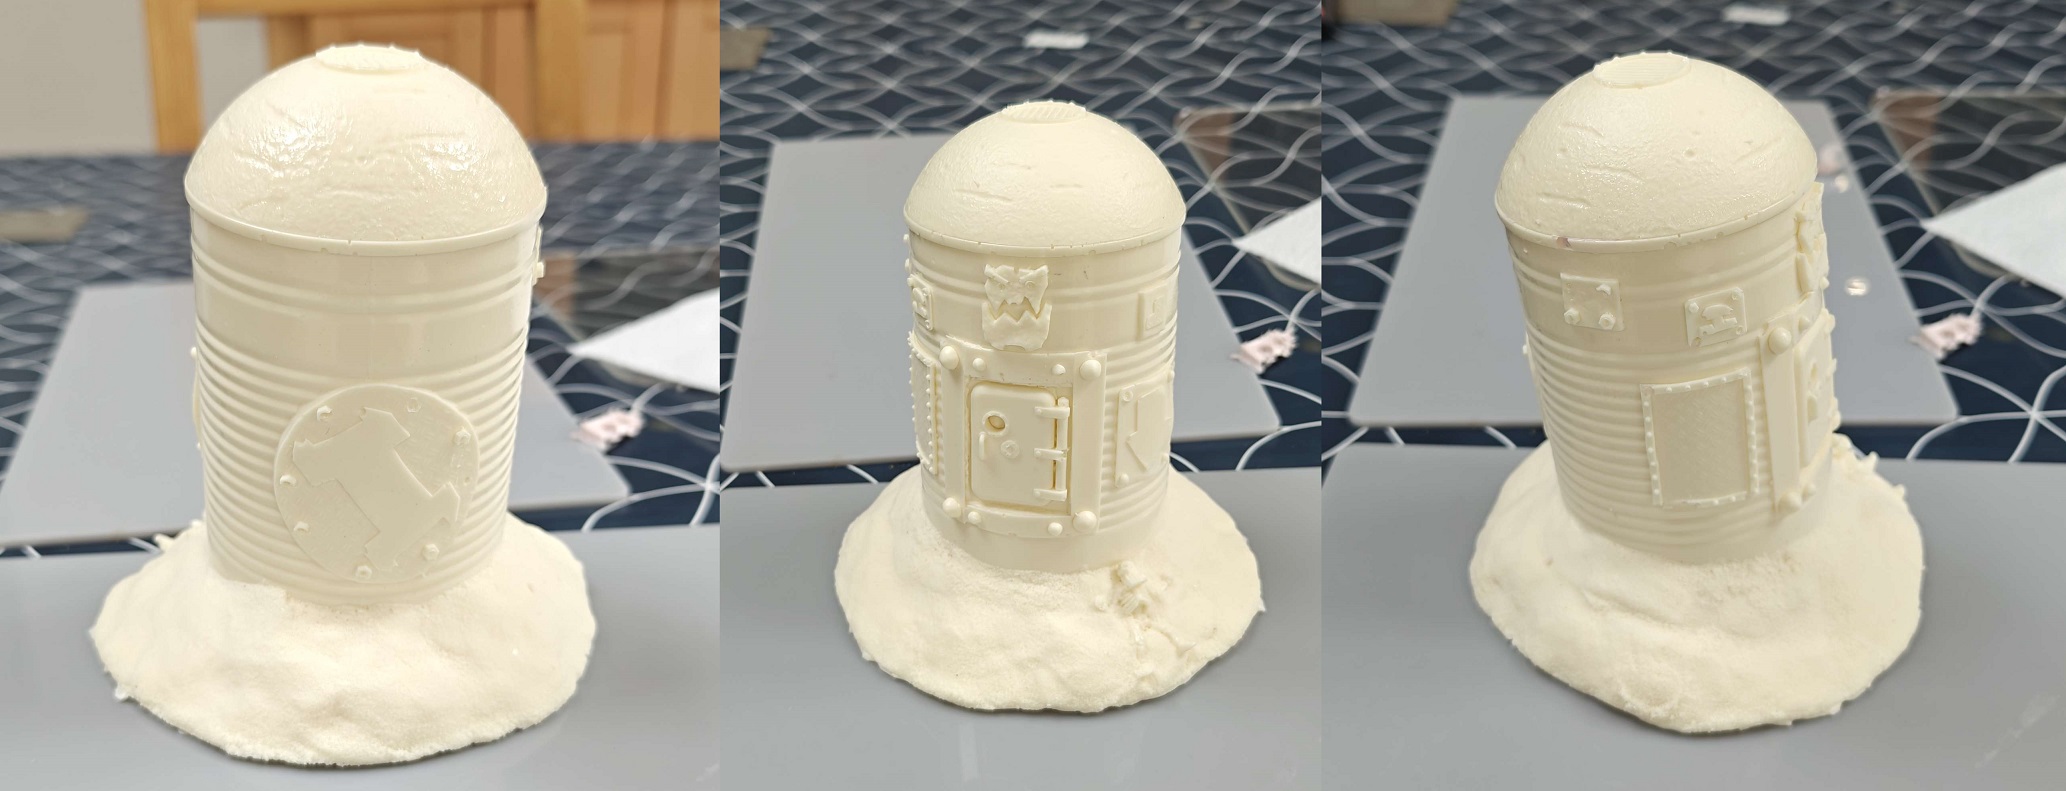
So with our mould now done it was time to cast our resin copy! The resin I used was Polycraft SG2000 polyurethane resin. This stuff cures really fast and gets *very* hot while doing so, especially when casting something huge like my drop pod. When mixing you have to work really fast otherwise it'll start setting in your mixing cup. Before prepping the resin I sprayed the inside of the mould with a thorough coating of Macwax.
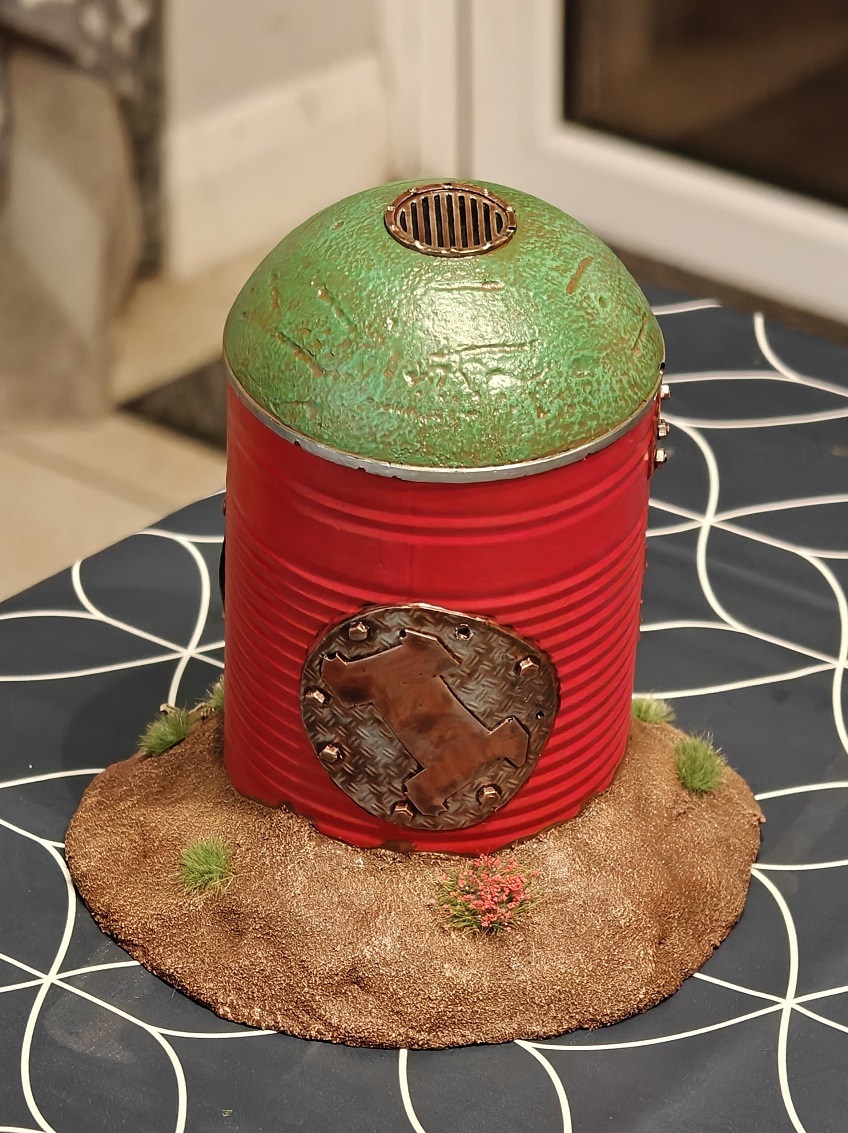
After a couple of hours of waiting and some more force, patience and profanity, out popped this first cast! Other than the random airbubbles, missing icon eyes and missing door valve this cast came out great! Much better than I expected actually. The fine detail is fantastic. Any airbubbles and missing bits can easily be fixed as I show below. I also sanded the bottom nice and flat and washed off any dust and release agent.
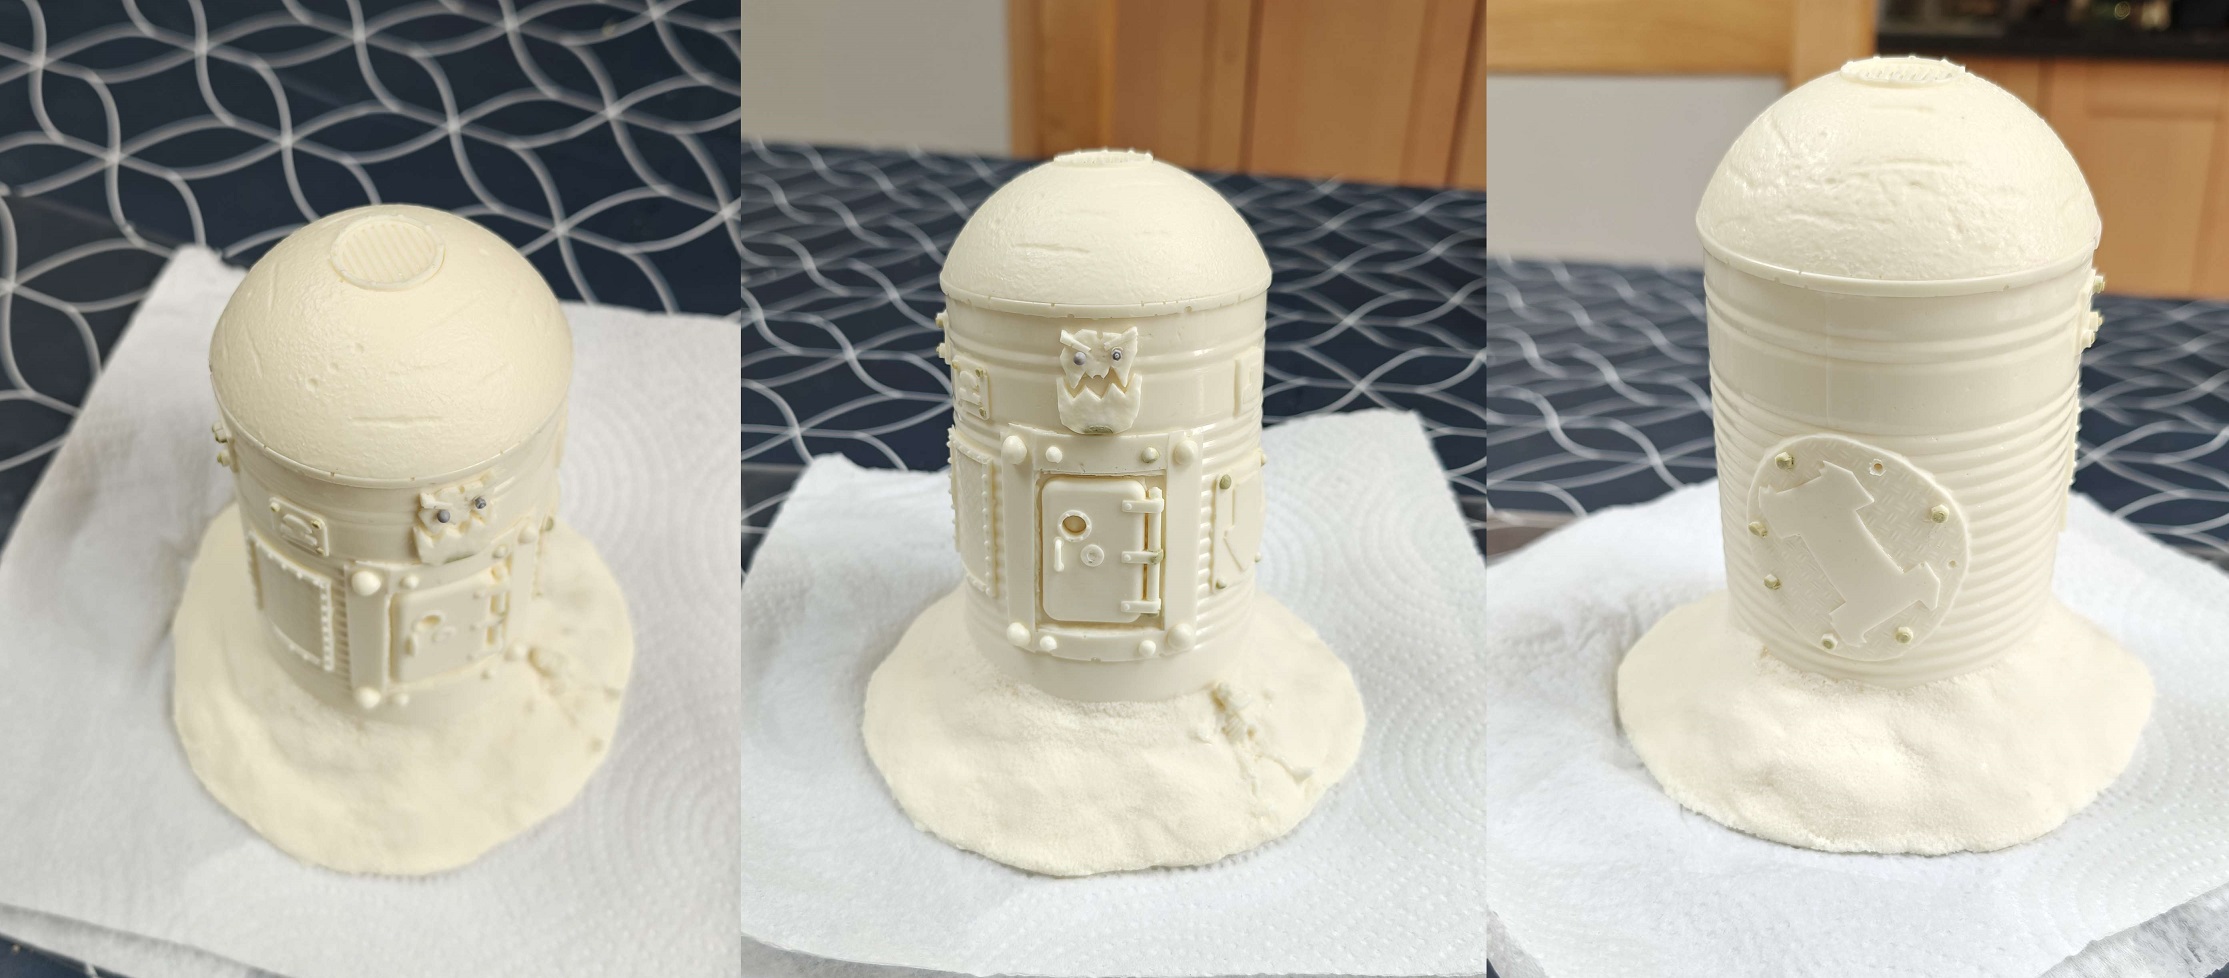
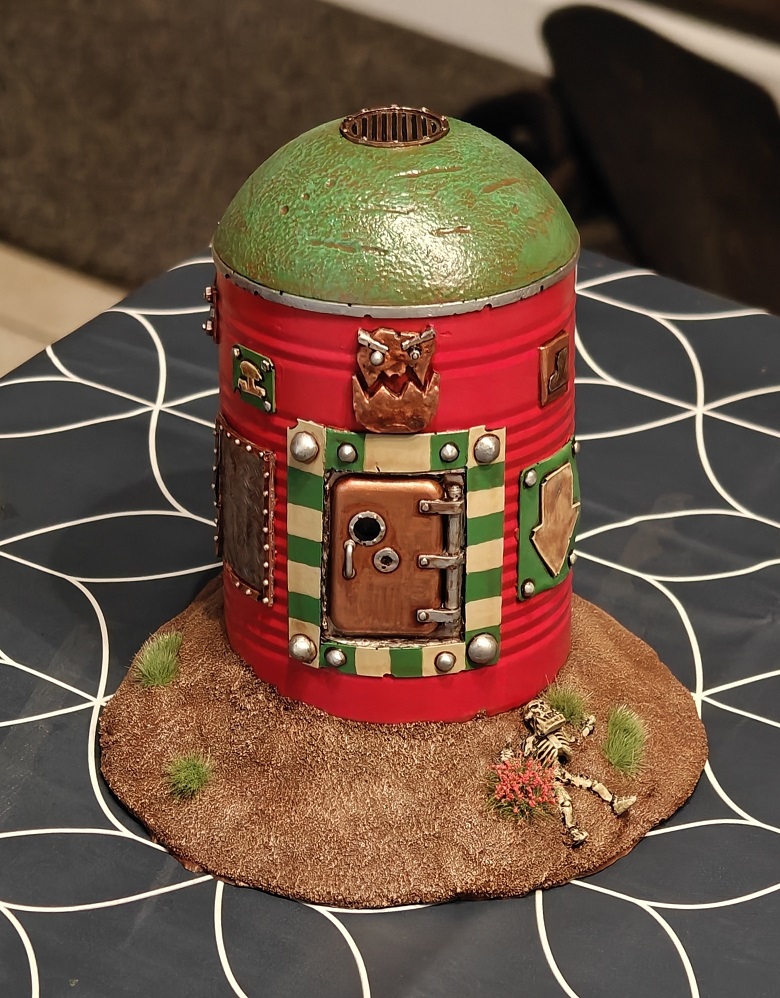
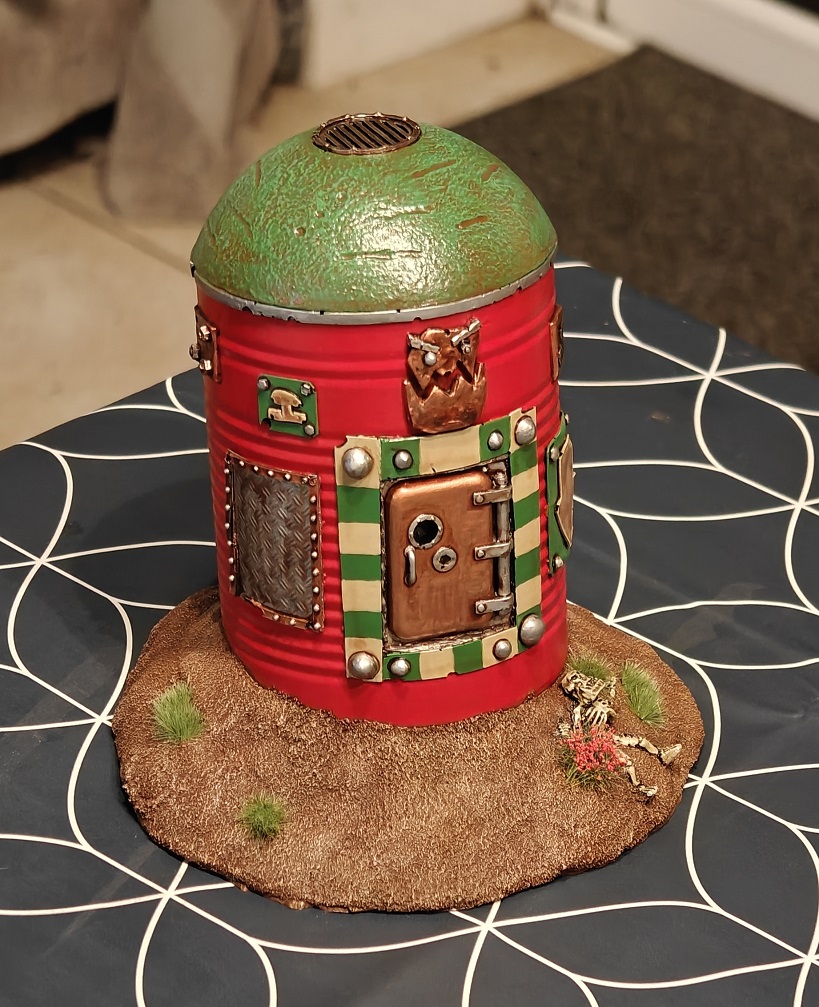
And here we are at the end. You can find below my final painted product, and now I can cast and paint as many drop pods as I want! This project was really fun and a great learning process. To achieve something like this you don't really need any skills. Just a lot of passion and some time spent online researching what you need to do! I'd recommend everyone try it for themselves, especially if you're working on an Ork project. Not only can you build terrain but you could cast up some ramshackle orky vehicles too. My tips would be:
- Think thoroughly before doing anything.
- Read as much online as you can.
- Make sure your box is well sealed before pouring your silicone, especially on a big mould.
- If you run out of silicone, don't worry. You can wait for your first pour to set and then add to it with a second pour. They'll both stick together.
- Get a slow curing resin if you want to reduce air bubbles.
Thanks for following this project of mine. I hope you enjoyed it and I'll see you in the next blogpost - Jack.