Written by: Jack
Planetary System: Sol
World: Earth
Date: 17.01.2026
Hello everyone, here we are for another blogpost. This time I'll be running you through my Ork Drop Pod I built early last year. "Ork Drop Pods?!?!" you might holler and shout in a fit of rage; "I've never seen these in my codex!!!". This is true, but Ork orbital assault vehicles have always existed in the lore. Usually Orks use crude asteroids full of boyz knocked out of orbit but they often use drop pods too.
In 2nd edition, a company called Epicast in the ol' USA was officially licensed by Games Workshop to produce large 28mm scale versions of models from Epic 40k (alongside a similar company named Armorcast). These models were quite crude, usually awfully cast but very charming. They produced a variety of kits but they are all very rare now, even rarer than the Armorcast ones. As such they go for a fortune on Ebay!
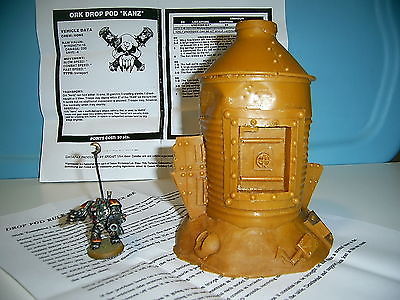
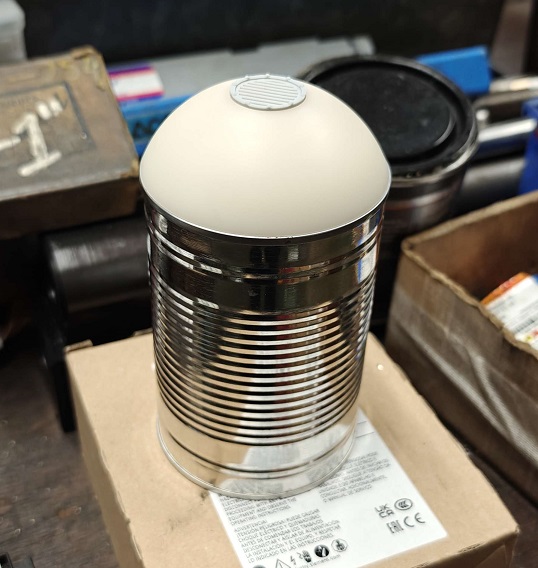
I was very interested in this model, but sadly I could not get one. It got me thinking though, surely I can make one myself? I've not made scratch-build terrain before but it is quite clearly just a tin can with half a funnel glued on top. How hard can it be?
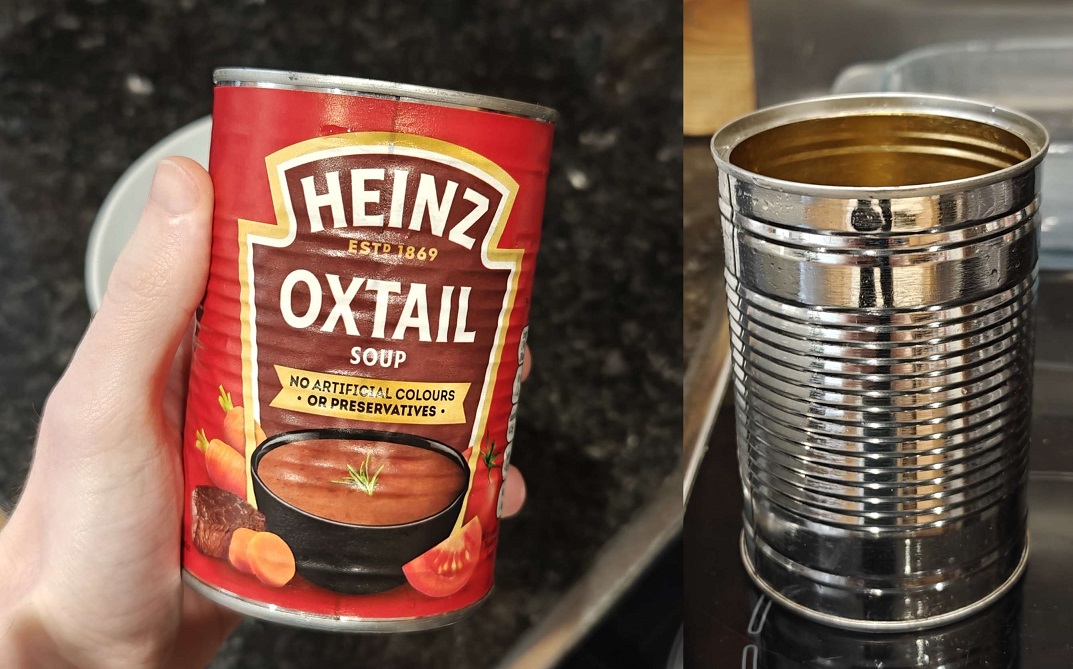
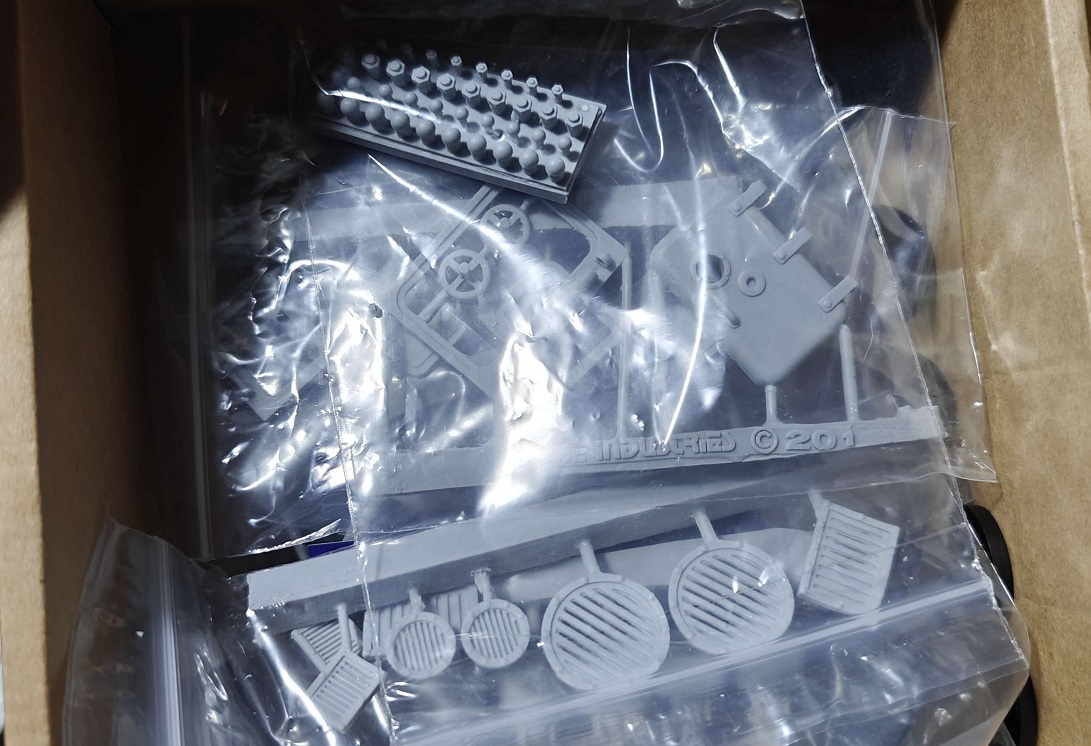
To start, clearly I needed a tin can. So the first step was to eat some soup for lunch. Delicious! I also acquired a bunch of nicely resin casted bits from Zinge Industries. I figured that it was a worthwhile investment as I can use them for future projects too.
Next I needed a roof for the can. I considered the funnel but I felt like a dome would make for a nice change. I was inspired by the old Soviet (but still used today) T-54, T-55 and T-62 tanks with their wide dome-shaped turrets. To make one I used a scrap piece of natural nylon bar from my workplace and turned it on the CNC lathe to make a clean dome shape. Afterwards on the manual lathe I cut an indent to slot one of the Zinge round grates in and parted the whole thing off.
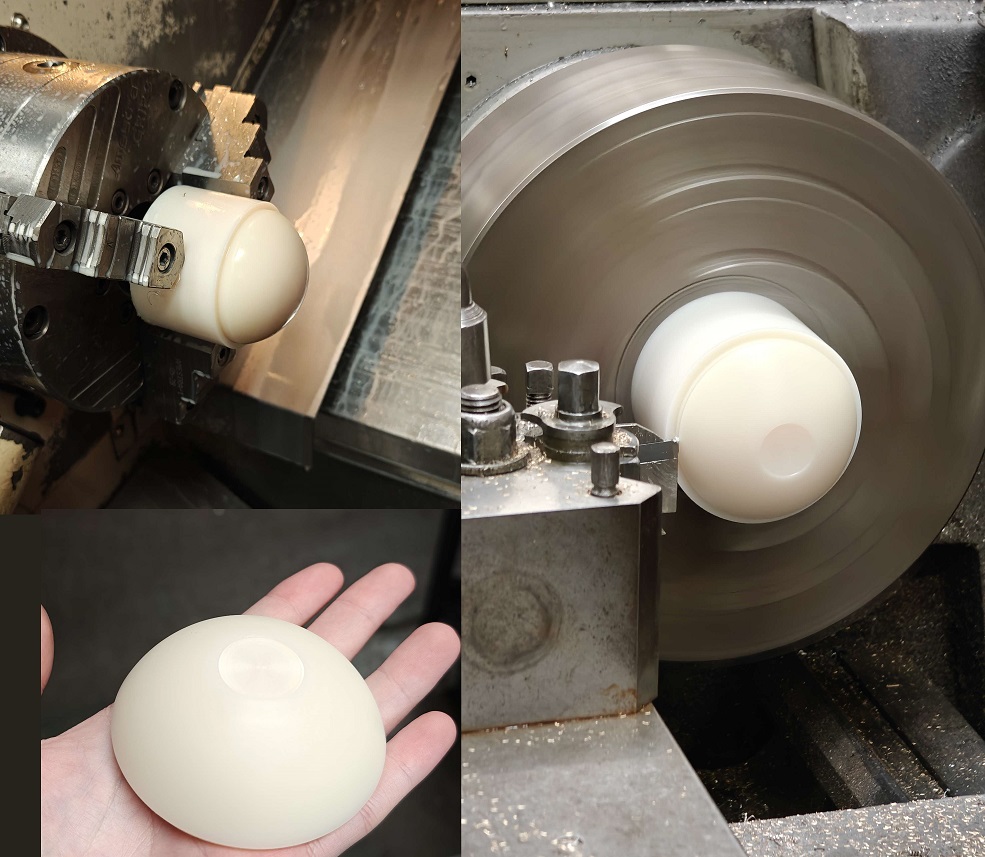
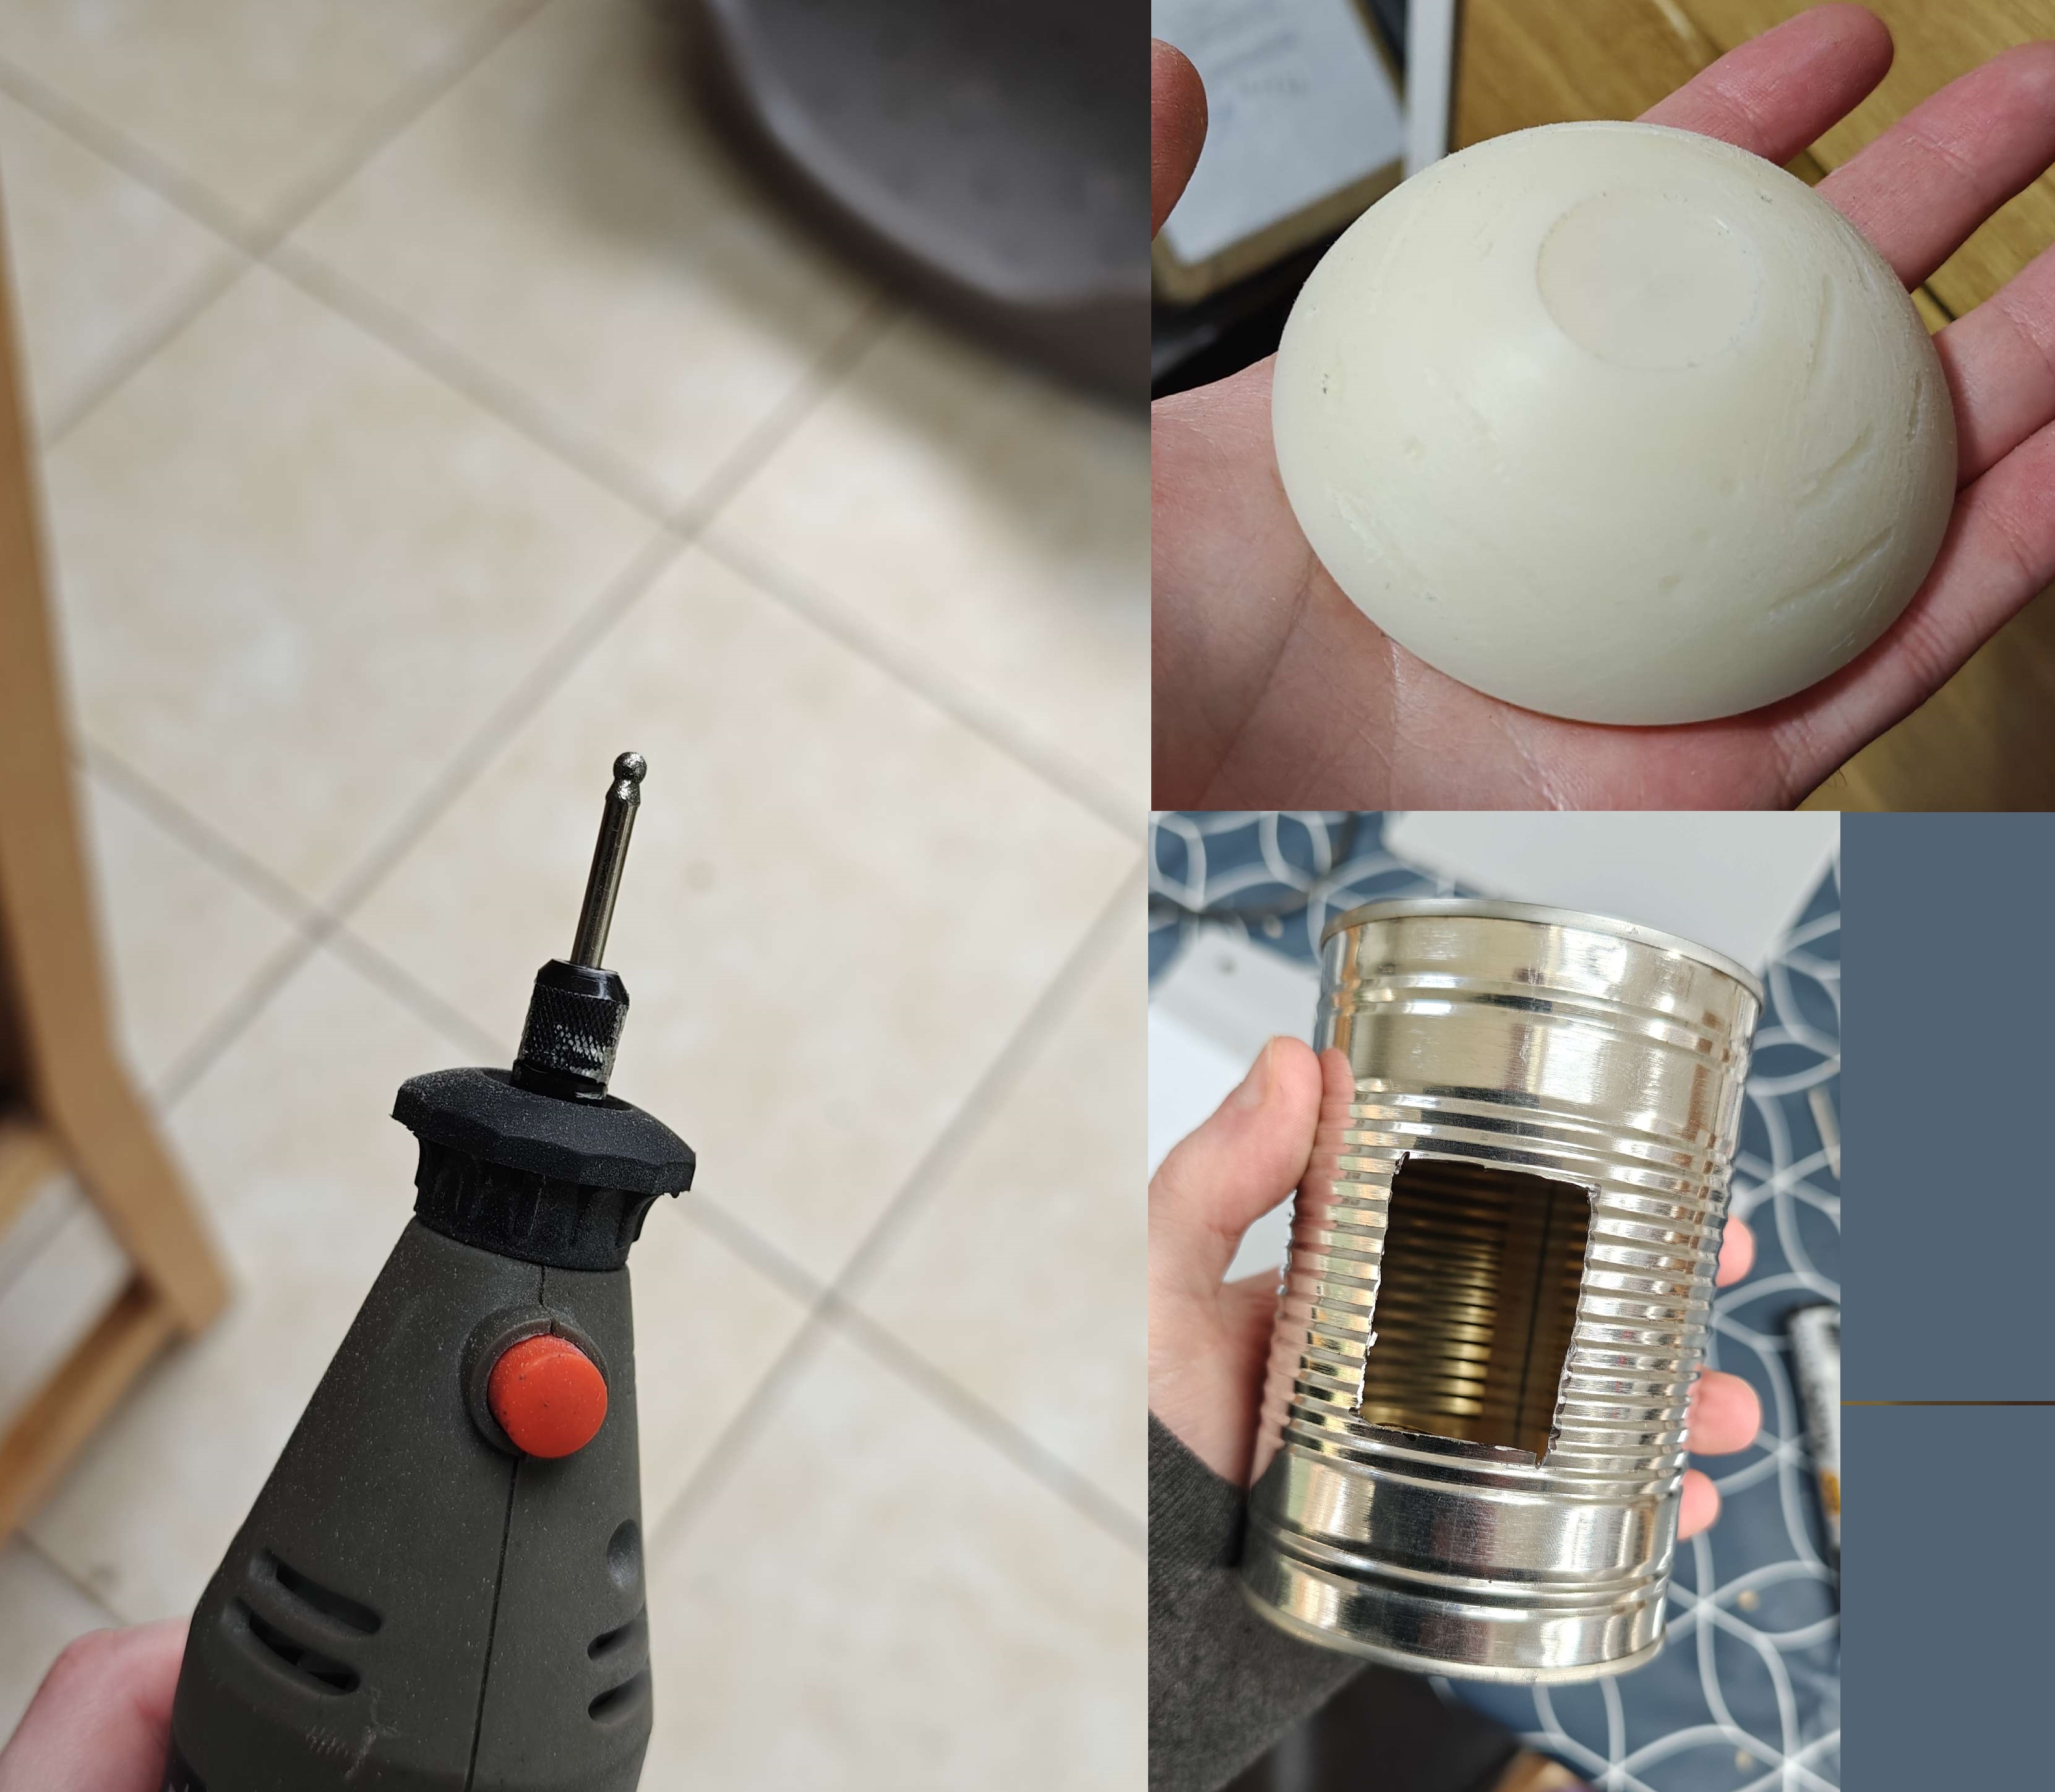
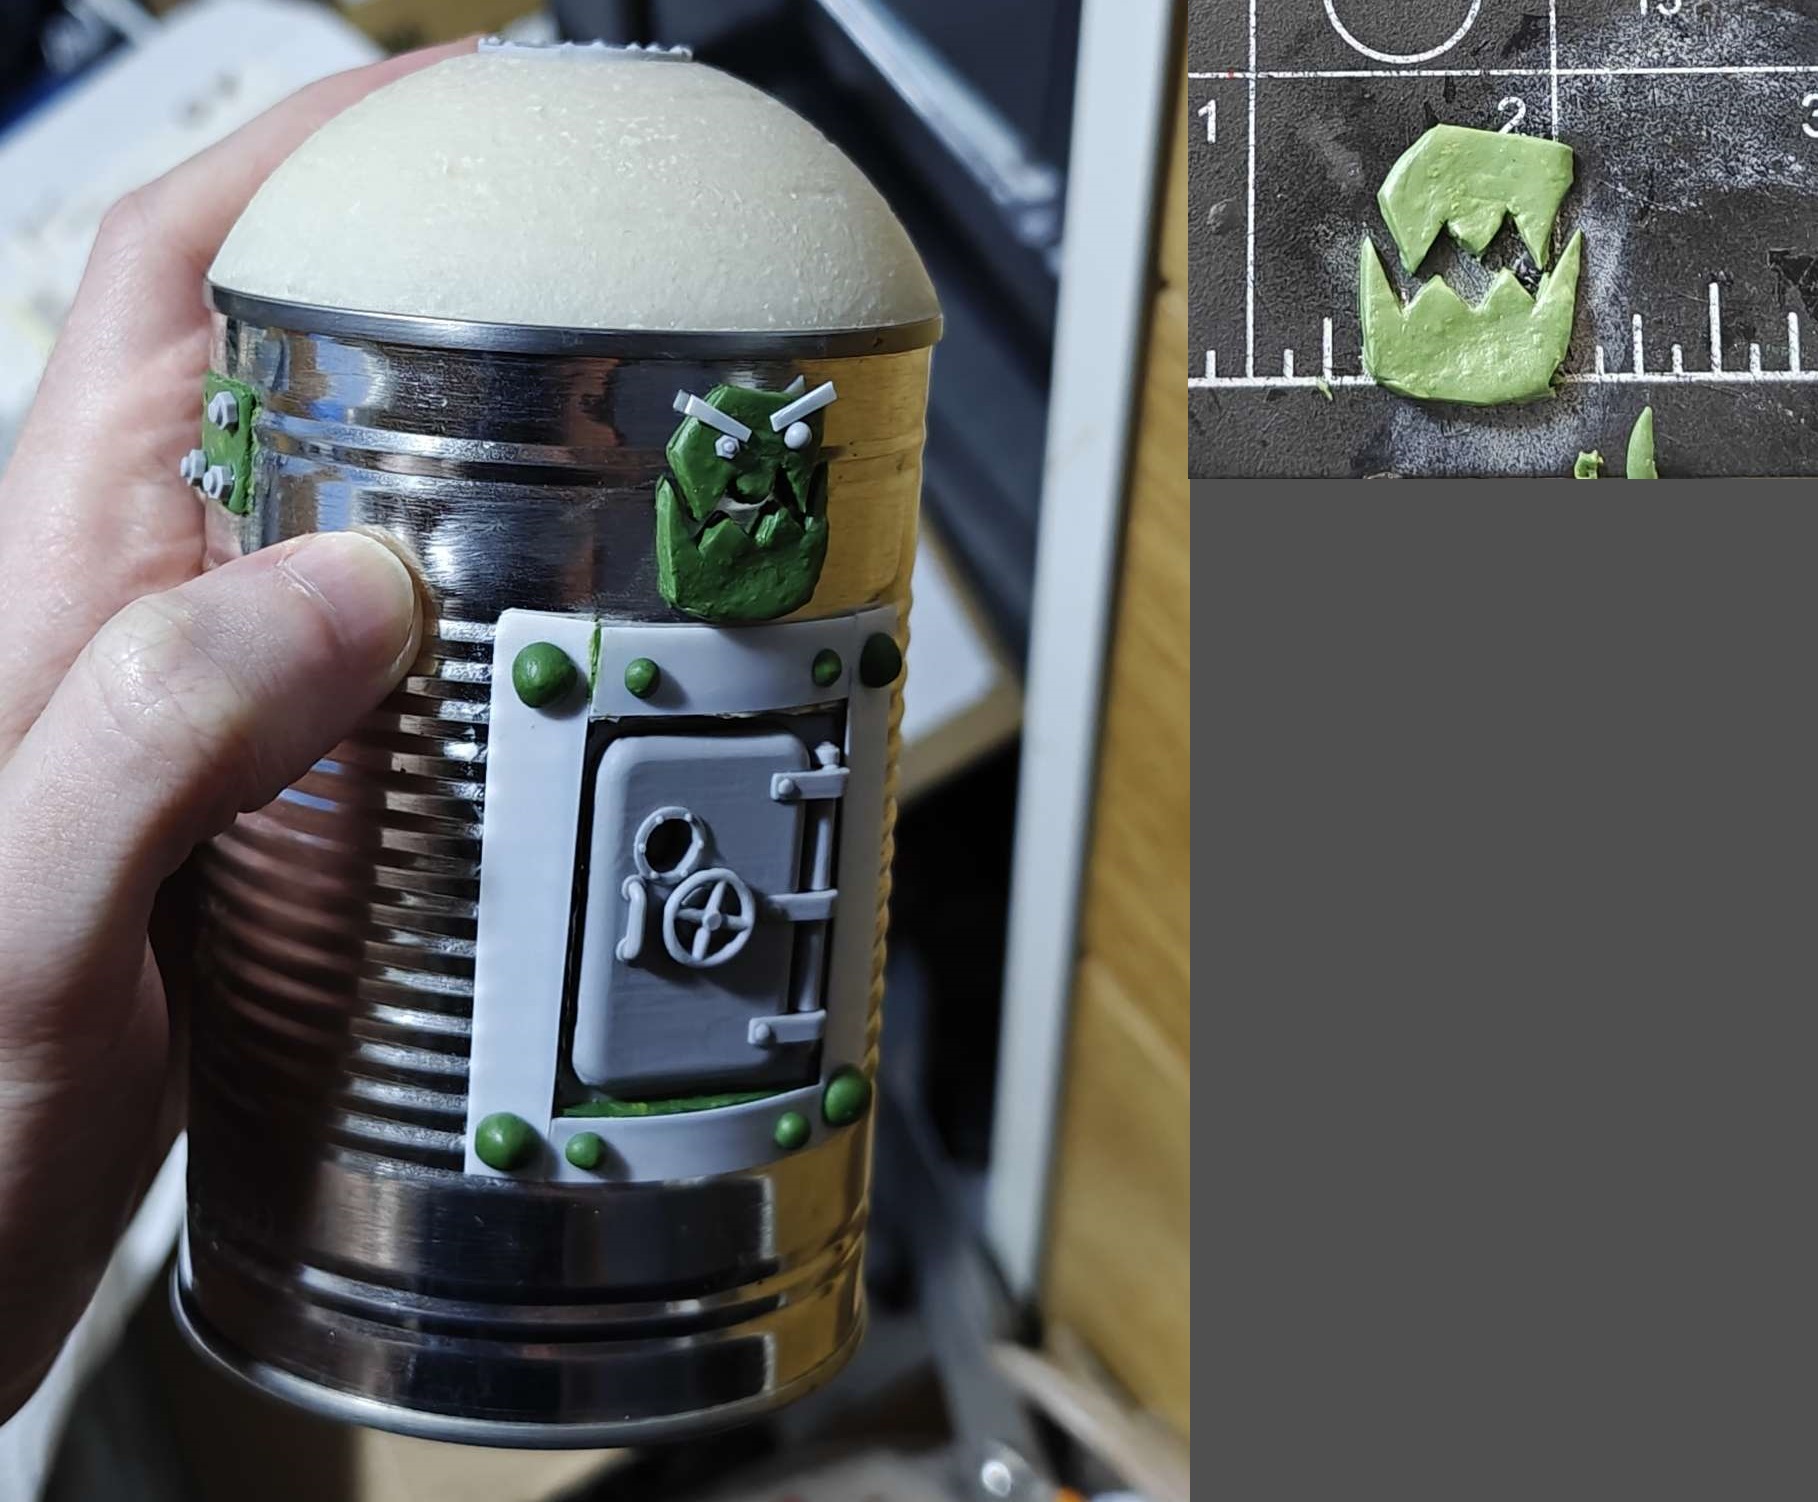
Next I cut a cavity in the side of the can with a dremel equipped with a grinding wheel. Afterwards I brutalised my pristine dome with a ball nose tip to make it look more orky.
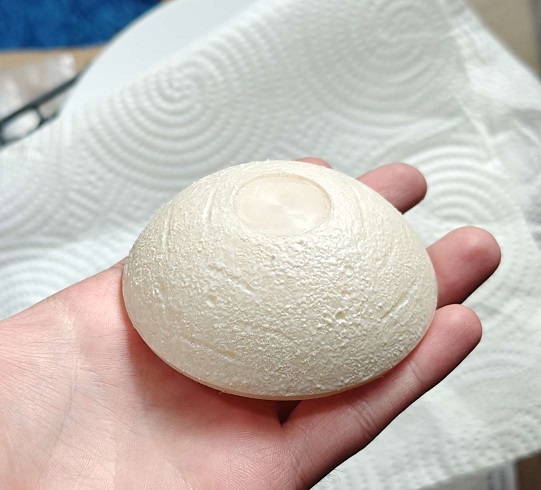
Continuing on the old Soviet line of inspiration, I wanted the dome to look like it was very roughly cast steel or iron. Soviet WW2 vehicle turrets had especially rough casts covered in scars, it gave them a really interesting texture. To do this I layered on Mr. Dissolved Putty (yes, it's really called that!), waited about 30 minutes for it to set a bit, then I stippled more on with a big craft brush. This gave it a really rough finish and helped blend in the scars from the dremel. After waiting 24 hours I sanded the whole thing smoother.
At this stage I began filling the can with details. I placed a big ship-like door in the hole and set it in place with lots of greenstuff. Various other plates were attached made from plasticard and more greenstuff.

I felt that the pod needed a figurehead and central point of interest so I crudely sculpted an ork idol to hang over the doorway. e's watchin' for da boss.
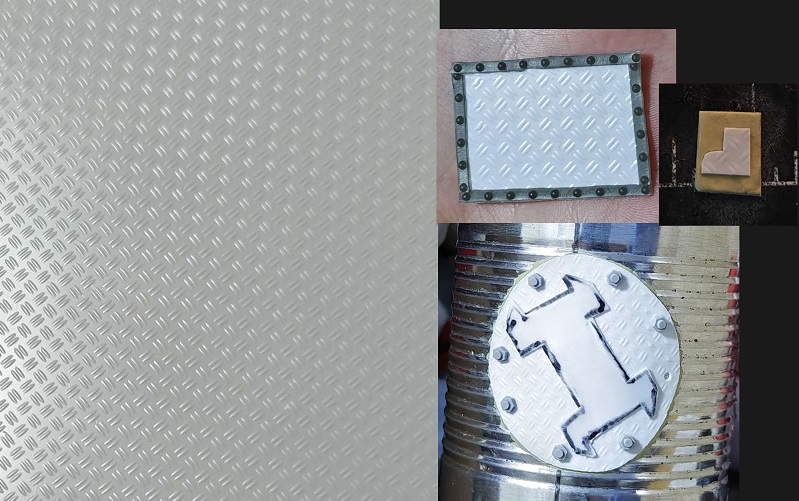
I had this tread-plate plasticard sheet that was excellent for making visually interesting scrap panels. Mixing up a variety of textures on your model is a great way at making it look more interesting. The grey strips of rivets are this weird flexible stuff you can get from Zinge, it was quite difficult to use but worked out in the end.
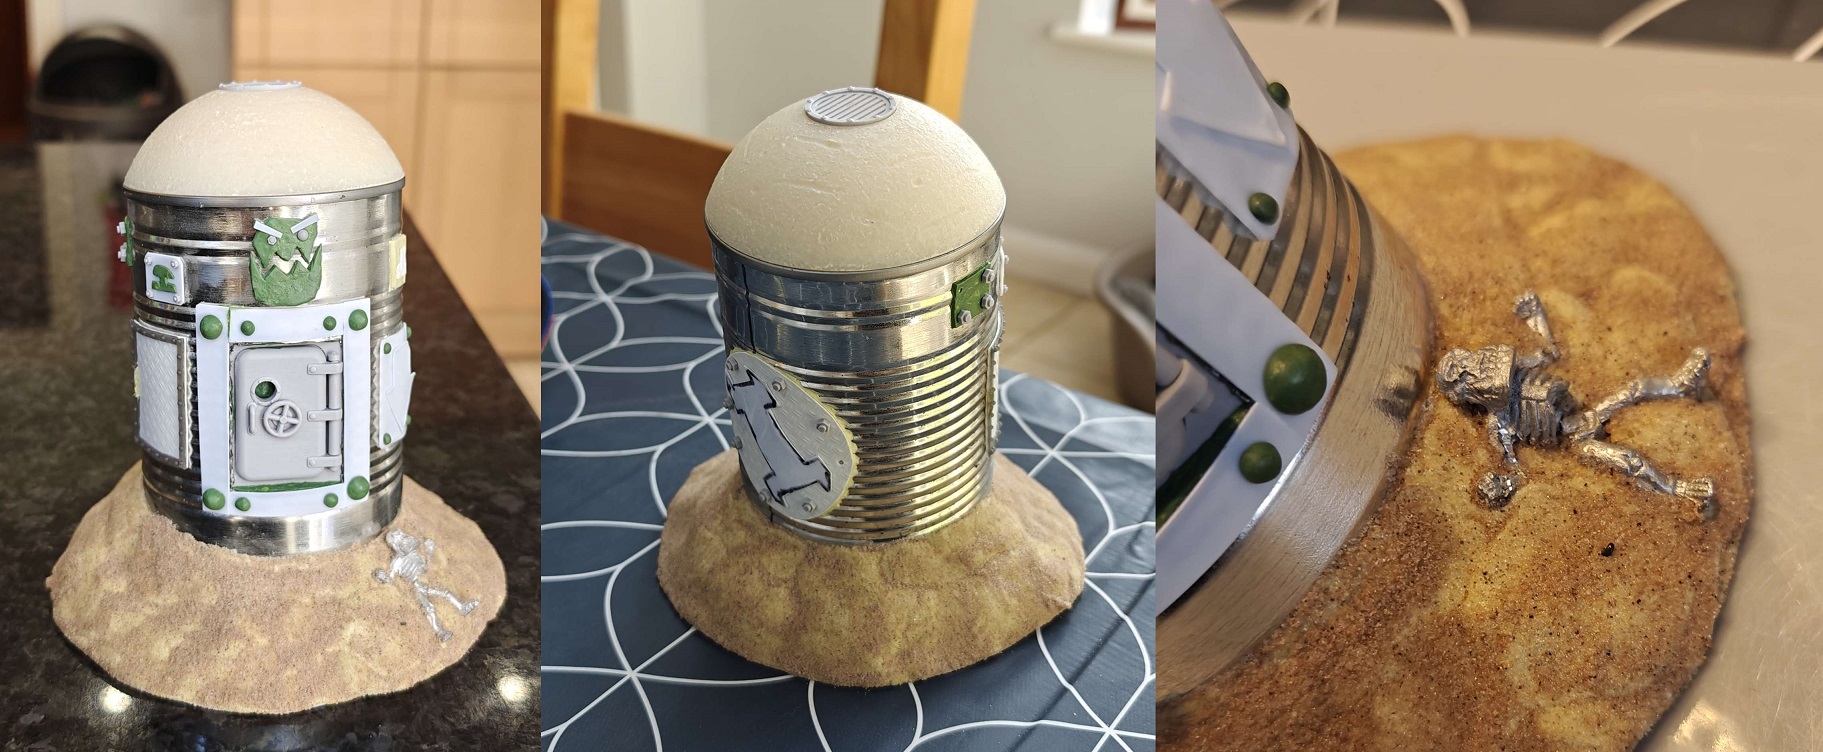
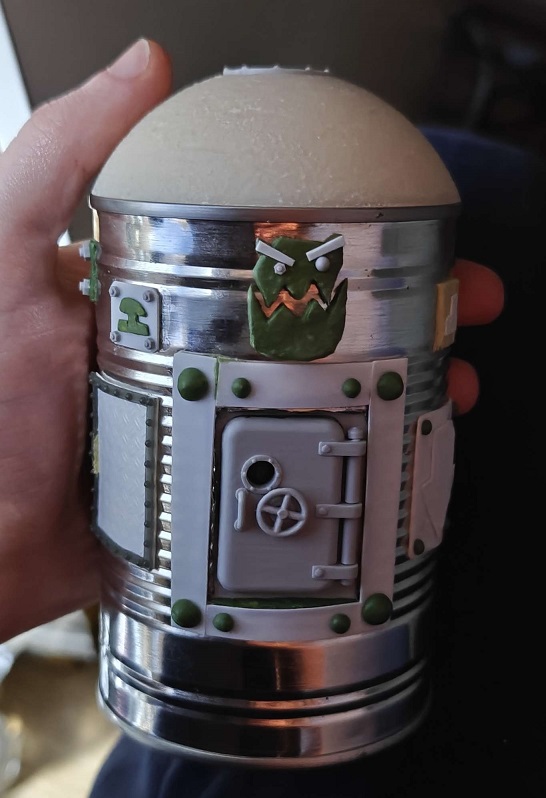
Here's the complete can. I added some appropriate Ork runes I read about in one of the books. The boot sigil is so the can is better at crushing the enemy on landing, the downwards arrow is there so that everyone knows which way it's supposed to go and the "invasion" symbol which looks like a nuclear mushroom cloud felt very appropriate.
Next it needed a base. I cut a wide rough circle out of plasticard and then glued the can and some scrunched up tin foil to it as filler for the mound of earth. I went over the tinfoil with (a lot of) milliput. Finally a skeletal ork was attached. This miniature was from Battlezone Miniatures (extremely cheap, I have no idea how they survive!) and was heavily cut up and repositioned.
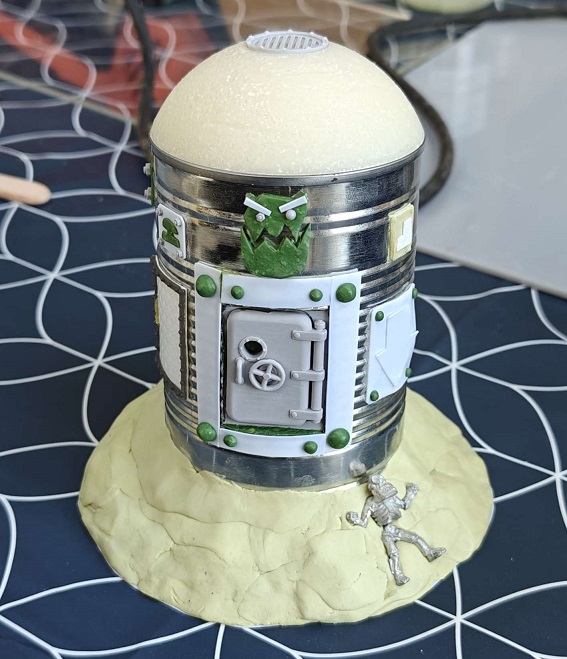
After some PVA and sand, here's the final product! This model was created with one-part casting in mind, as such it is shaped in a "wider at the base, narrower as you go up" way to make it easier to pull out of the mould. I filled in behind the panels with smoothed out milliput to stop the silicone from seeping behind them as much as I can. After a soapy wash (before the sand) I coated the sand and the model with two coats of varnish to help protect it which will be especially relevant when I have to very forcefully pull it out of the mould.
Overall I am really happy with this build! I didn't go for the wings that the original Epicast one had as I wasn't confident in my ability to get them to work in the mould (this is my first time working with silicone!). In the next blogpost I'll show off the silicone mould and the complete resin casted copy, with paint job of course! Thanks for reading everyone - Jack.